M1 MacBook OpenGL 配置
该文章写于 M1 芯片刚刚发布之时,部分内容距今已有较大变化,仅供参考。
之前说了,买了 M1 的 MacBook 后,配置环境不折腾是不行的。
这不,计算机图形学的实验就需要配置 OpenGL 的环境。而且令人感动的是呢
- 实验指导 PPT 里只说了在 Windows 下的 Visual Studio 环境配置
- 找到了英文原版教材,其中最新版已经弃用 OpenGL 改用 WebGL 了(WTF?)
- 找到了旧版的英文原版教材,发现里面也只说了在 Windows 下 VS 的环境配置
- 上网搜了一遍,从 macOS Mojave 开始,macOS 就已经弃用 OpenGL 了 ...... 虽然还在,但是每次编译都会有弃用的警告
- 还要考虑有没有编译好的 Arm 版本的 OpenGL 相关的库
1. 需要安装的库
看了下实验的 PPT,需要安装的有 glut、glew 和 glm。搜了一下,参考这个教程发现,macOS 自带 glut 框架(虽然也是被弃用),glew 和 glm 可以通过 homebrew 安装(而且有 arm64 的版本)
1 2 | |
同时我也装了 glfw 和 freeglut
1 2 | |
安装后,这些库都可以在/opt/homebrew/lib中找到,头文件都可以在/opt/homebrew/include中找到。
2. 环境变量设置
下载到实验要用的示例代码:
1 2 3 4 5 6 7 8 9 10 11 12 13 14 15 16 17 18 19 20 21 22 23 24 25 26 27 28 29 30 31 32 33 34 35 36 37 38 39 40 41 42 43 44 45 46 47 48 49 50 51 52 53 54 55 56 57 58 59 60 61 62 63 64 65 66 67 68 69 70 71 72 73 74 75 76 77 78 79 80 81 82 83 84 85 86 87 | |
但是因为 arm 版的 homebrew 的 include 路径不是/usr/local/include,library 路径不是/usr/local/lib,因此一打开代码,首先就是提示无法找到头文件。因此,可以通过在~/.zprofile中设置如下的环境变量:
1 2 | |
同时,在手动编译时,如果直接加-lglew -lglut参数,ld也是找不到这些库在哪的,因此还要在~/.zprofile中设置
1 | |
最后,通过
1 | |
使改变生效。
3. 手动编译
之后,尝试通过clang++编译:
1 | |
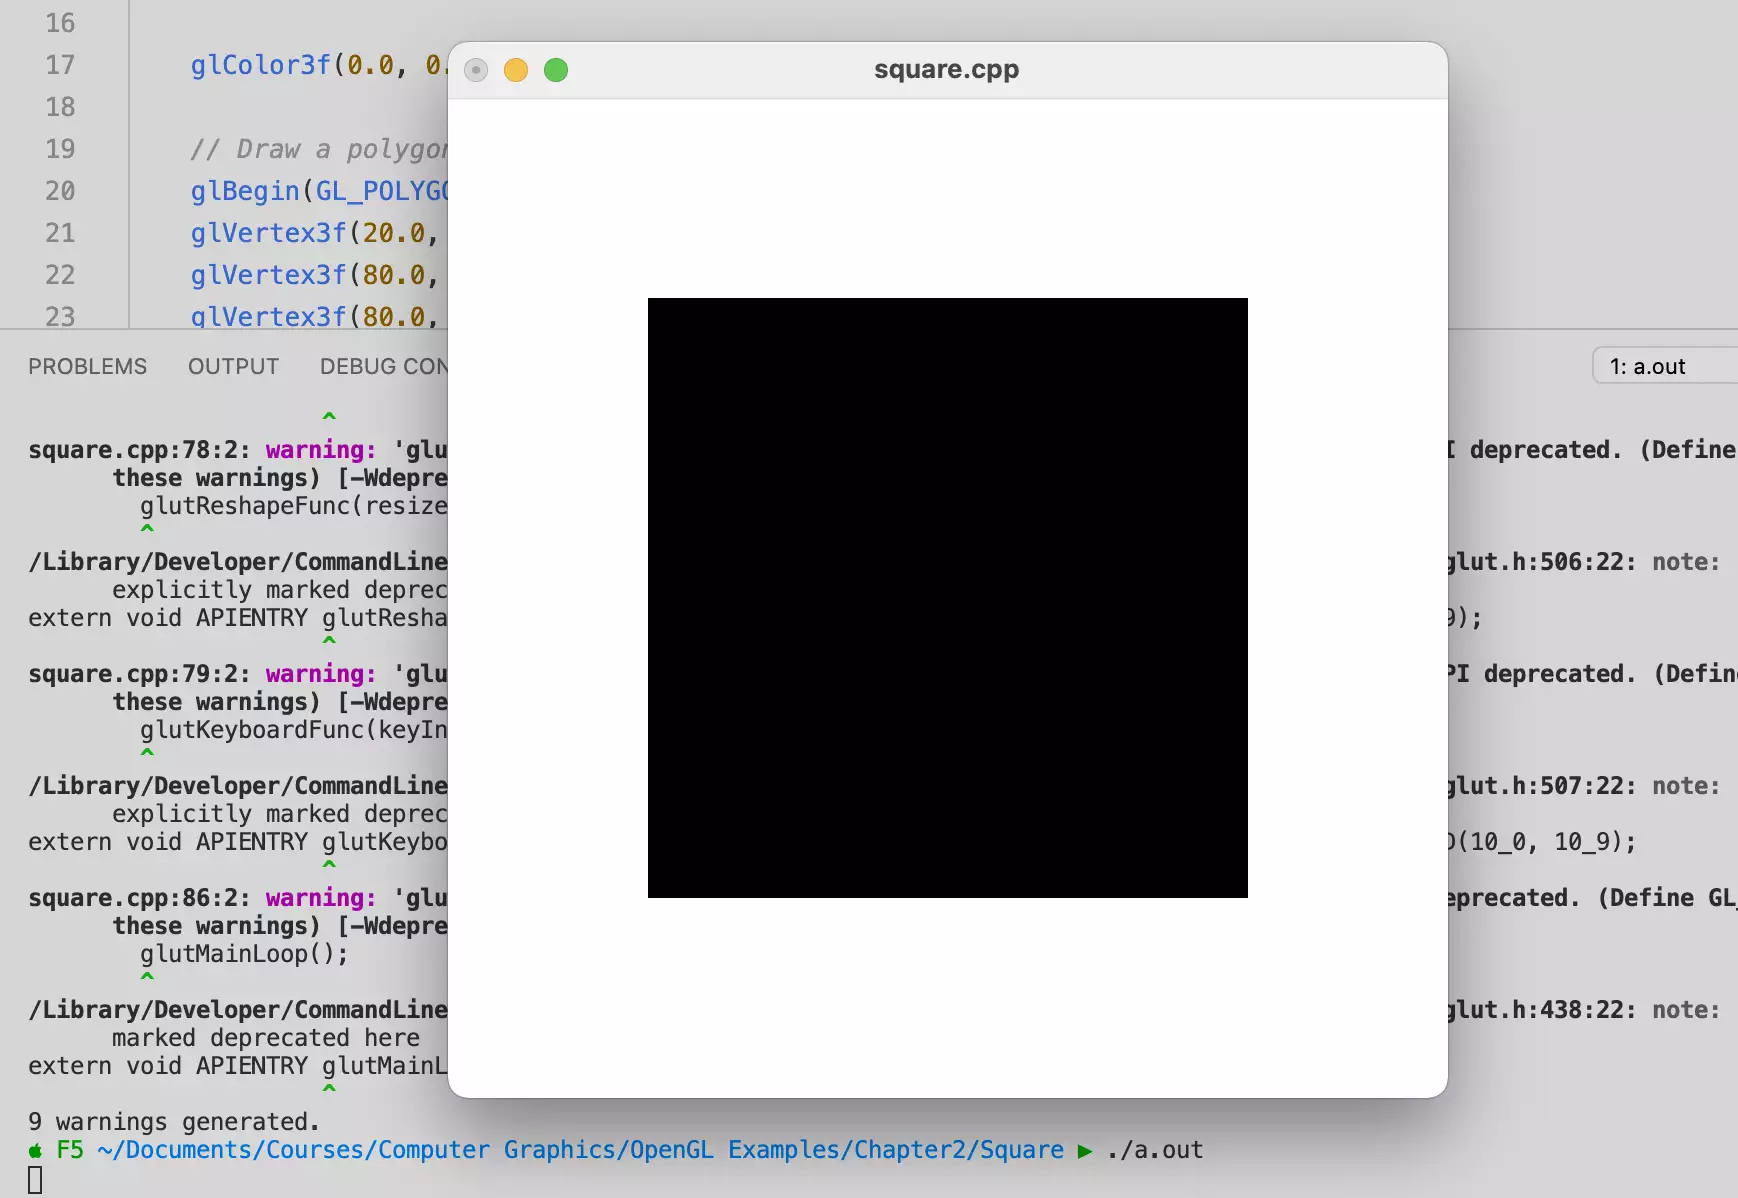
编译成功,但是运行的时候会提示

在尝试了各种方法后,都没有解决,甚至这个问题都搜不到。猜想可能是用了 freeglut,没有用系统自带的 glut 框架。因此需要将上述代码的
1 | |
换成
1 | |
这里的 GLUT 并不在/opt/homebrew/include下,而是/Library下的 Command Line Tools 的某个目录,但是换到这个头文件后,glutInitContextVersion和glutInitContextProfile这两个函数提示找不到,因此直接将其注释掉,然后再手动编译运行:
1 2 | |
Fine!
4. XCode 配置
但是直接敲命令行编译,工程量大了就很麻烦,因此可以在 XCode 里使用相似的配置建立一个项目。在新建界面选择 MacOS Command Line Tool。
新建后,首先在项目设置中添加以下框架:
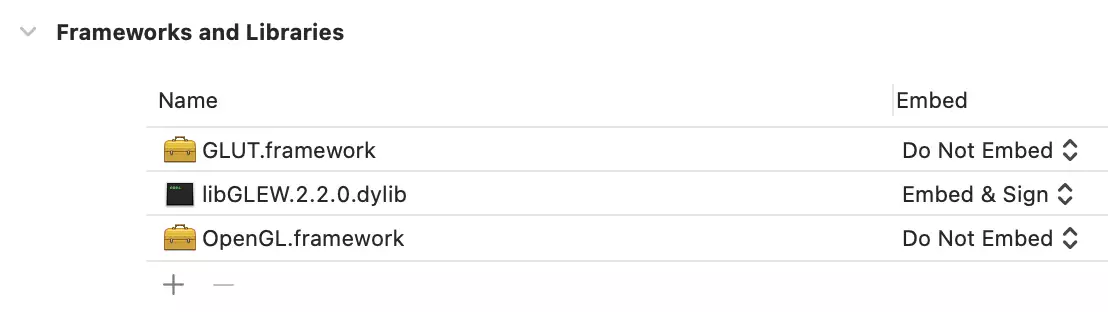
然后添加/opt/homebrew/include为 Include Path
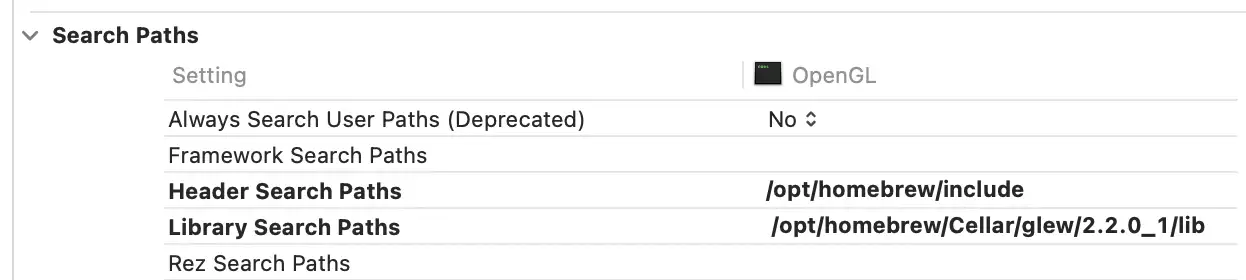
之后运行,但是会产生 SIGABRT 错误,原因是引用的 libGLEW.dylib 没有经过 codesign。
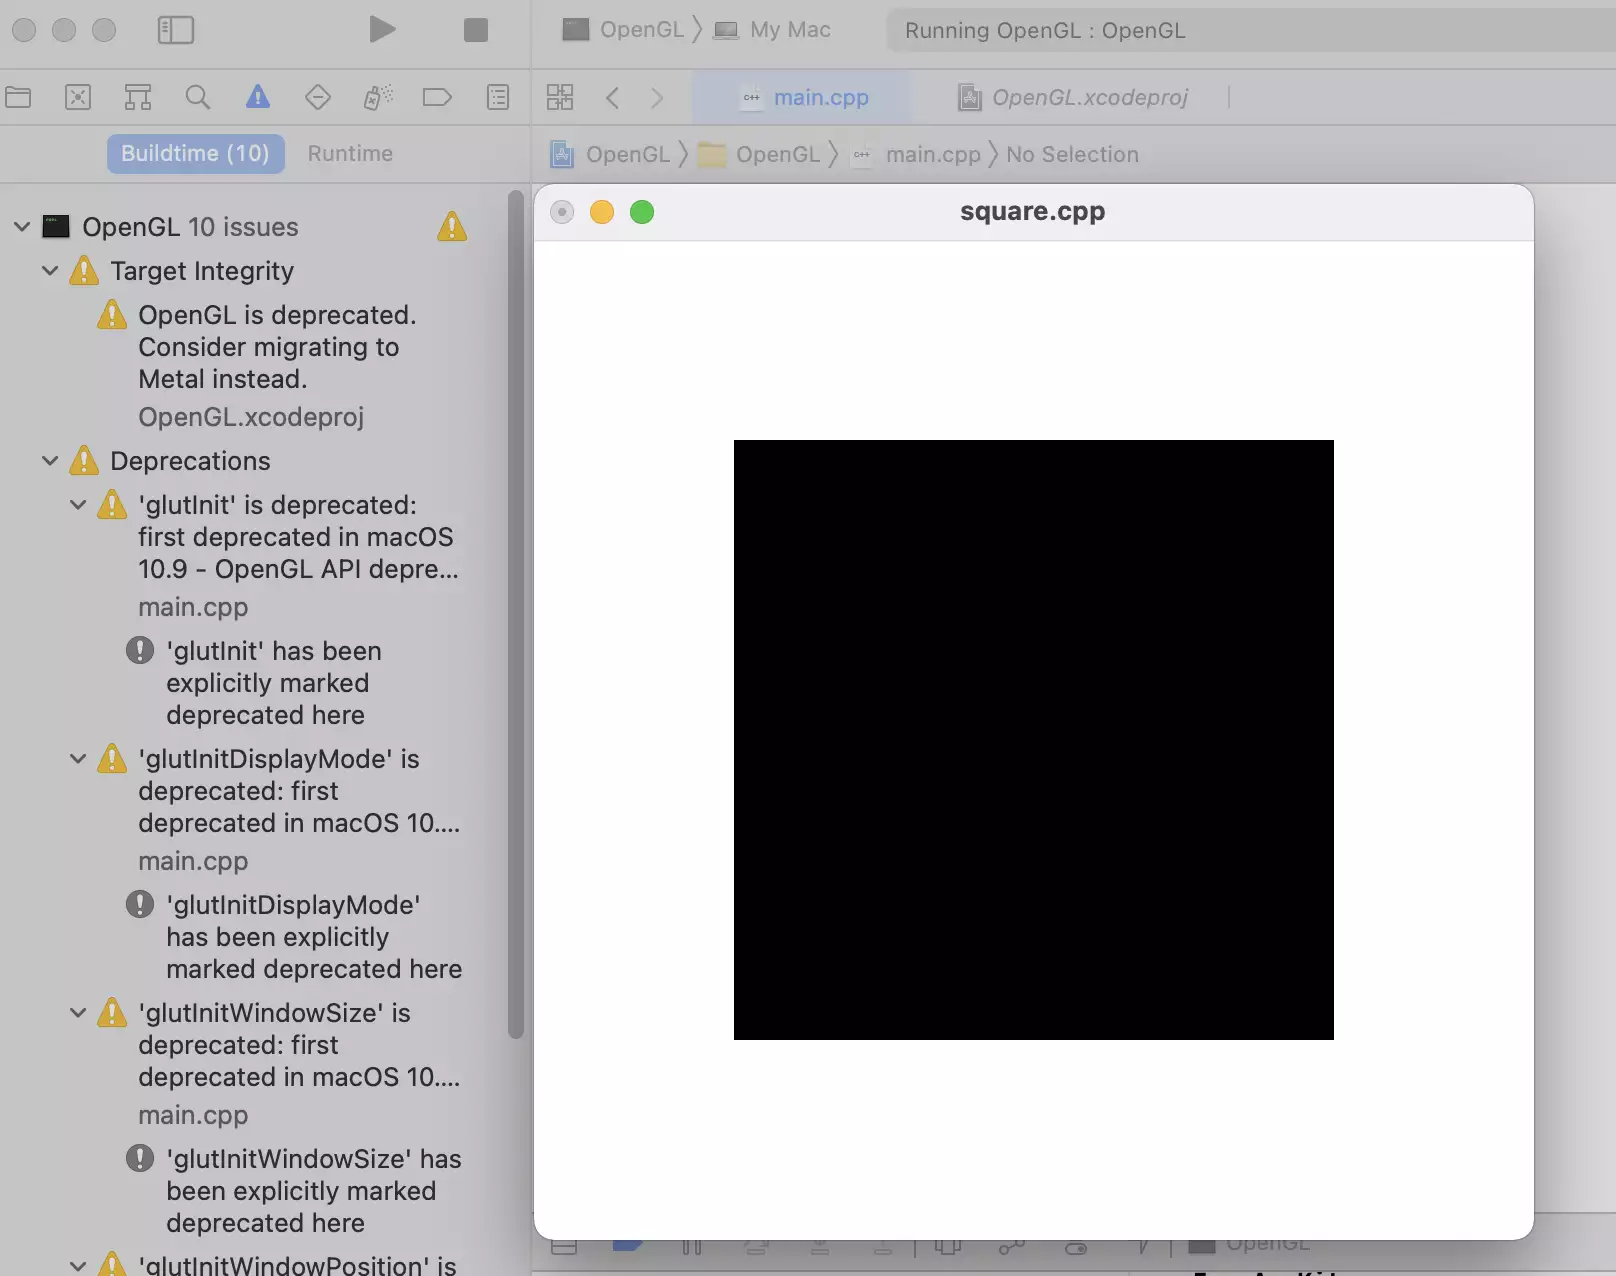
在终端输入以下内容,使用自己的 Apple ID 邮箱对 GLEW 库进行签名:
1 | |
然后编译运行,虽然也是有一堆弃用警告,但是运行成功!
5. 总结
(凭什么非要用臃肿的 Visual Studio 呢?之前数字图像处理的实验课也是,自己手动在 Linux 下面配置 fftw3 的环境来写。只要爱折腾折腾,就没有配置不好的环境)
当然,计算机系统结构那个实验,直接发来一个 .exe 的 MIPSsim 模拟程序也是没办法。